Maintain Standard Hierarchy for Cost Centers - OKEON
(OKEON, OKENN)
Purpose
Use this transaction to change or display a standard
hierarchy.
When to do this
Perform the change procedure when an approved request form
to make a change to a standard hierarchy is submitted to the Shared Services Center. The display procedure will be performed by a brand or function to
view standard hierarchies for informational purposes.
Prerequisites
Approved Request Form
Menu Path
Use the following menu path(s) to begin this transaction:
·
Select Accountingto go to the Standard hierarchy for cost centers Change
screen.
·
Select Accountingto go to the Standard hierarchy for cost centers Display
screen.
Transaction Code
Helpful Hints
Click on
 to close the detail area in order
to fully view the standard hierarchy area.
to close the detail area in order
to fully view the standard hierarchy area.
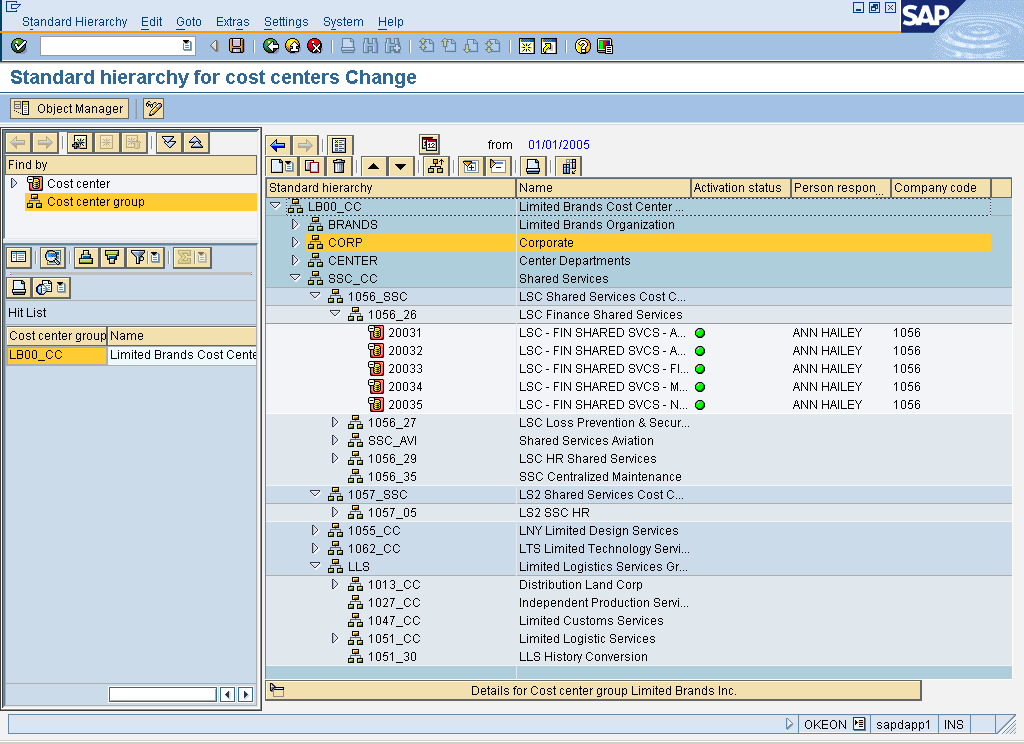
Click on  to
drill down further to view the roll ups into each group.
to
drill down further to view the roll ups into each group.
Using the right-click feature when the cursor is on a
group allows you to select the option of creating a cost center or grouping at
the same level or a lower level of the hierarchy selected. Also allows for
quick deletion or copying.
 indicates
a Cost Center Group
indicates
a Cost Center Group
 indicates
a Cost Center
indicates
a Cost Center
Procedure
1. Perform one of the following:
|
If
|
Then
|
|
Changing the standard hierarchy,
|
Use transaction code OKEON
|
|
Displaying the standard hierarchy,
|
Use transaction code OKENN
|
2. Start
the transaction using the menu path or transaction code.
Standard
hierarchy for cost centers Change
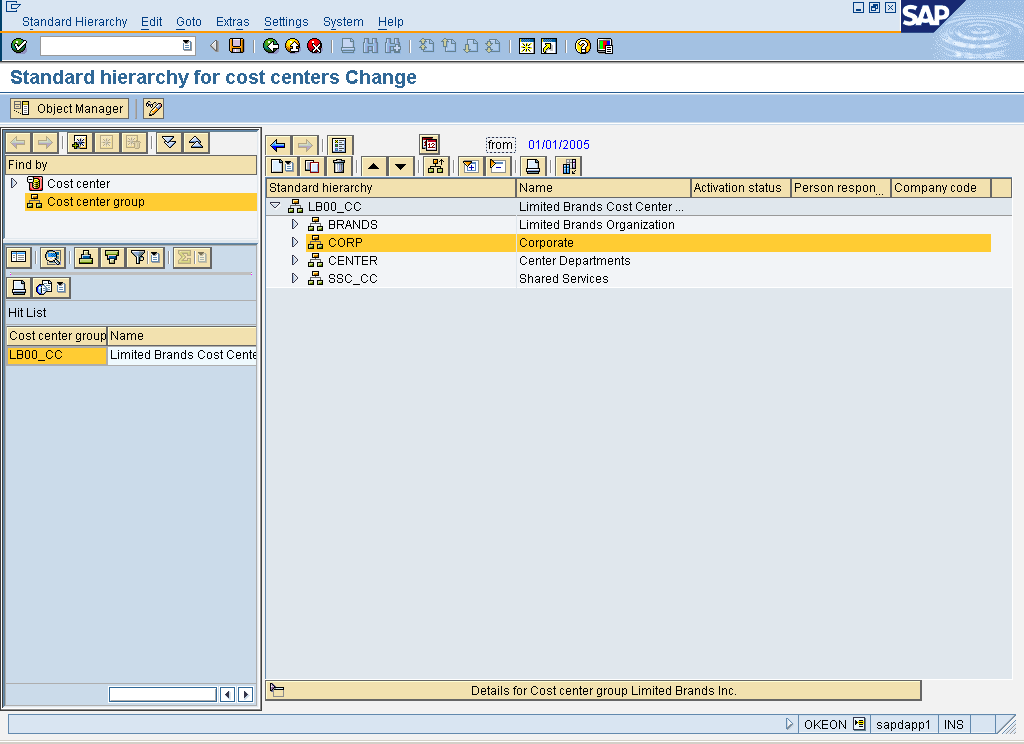
 The maintenance screen is divided into
different areas, each of which covers particular functions:
The maintenance screen is divided into
different areas, each of which covers particular functions:
1.
-
|
Area
|
Description
|
|
Search Area
(Upper Left Corner)
|
In the search area, you select one or more organizational
units that you want to display or edit, or that you want to assign to the
standard hierarchy.
|
|
Overview Area
(Upper Right Corner)
|
The overview area displays the selected organizational
unit in a tree structure in terms of its assignment to the standard
hierarchy. This area allows the following:
·
Display/hide additional columns using the Column
configuration
·
Print the structure
·
Set the time interval in which the standard hierarchy,
including the CO objects contained in it, is to be processed.
·
Create new objects and assign them to existing objects.
·
Move the objects within the tree structure using drag-and-drop.
·
Select a different object for display or editing.
|
|
Detail Area
(Lower Right Corner)
|
In the detail area, you can display or edit the master
data of the individual objects. To display or edit the master data for a
particular object, choose the object in question by double-clicking on it in
the tree structure.
|
|
Selection Area
(Lower Left Corner)
|
In the
selection area, the organizational units selected are displayed in a list.
- Restrict the list using certain criteria by setting the filter.
For example, select all objects of an owner.
- Display and edit organizational units in the standard
hierarchy assignment and the related master data. To do so, the
following options are available:
- Choose the organizational units by double-clicking on
them. The system transfers the organizational unit to the central overview
area.
- Use drag-and-drop to move the organizational
unit to the overview area.
- Activate and delete inactive master data versions of
cost centers, business processes, and profit centers. To do so, select
the objects in the selection list.
To display individual
areas more clearly, hide other areas of the screen.
- To make the remaining areas of the screen larger, click
 . .
- When displaying large lists in the selection area,
hide the search area by clicking
 . .
If processing large structures in the overview area,
hide the detail area. To do so, click the pushbutton above the detail
area.
|
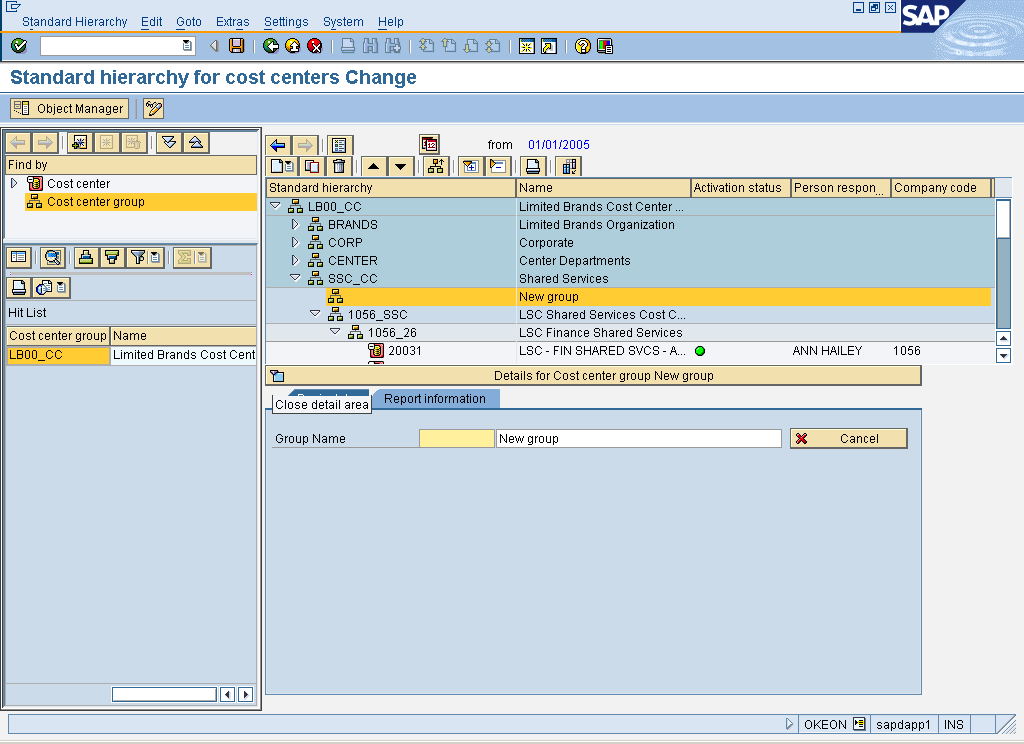
3. Click an existing group to create a new hierarchy group.
For example, click 
Standard
hierarchy for cost centers Change
4. Right-click  .
.
5. Select .
Standard
hierarchy for cost centers Change
6. As required, complete/review the following fields:
|
Field Name
|
R/O/C
|
Description
|
|
Name of Group
|
R
|
Name associated with the hierarchy group.
Follow the group naming convention (see
Business Process Overview section).
Example: 1056_54
|
|
Short Description of Group
|
R
|
Short description of the hierarchy group.
Example: Michele
Test Group
|
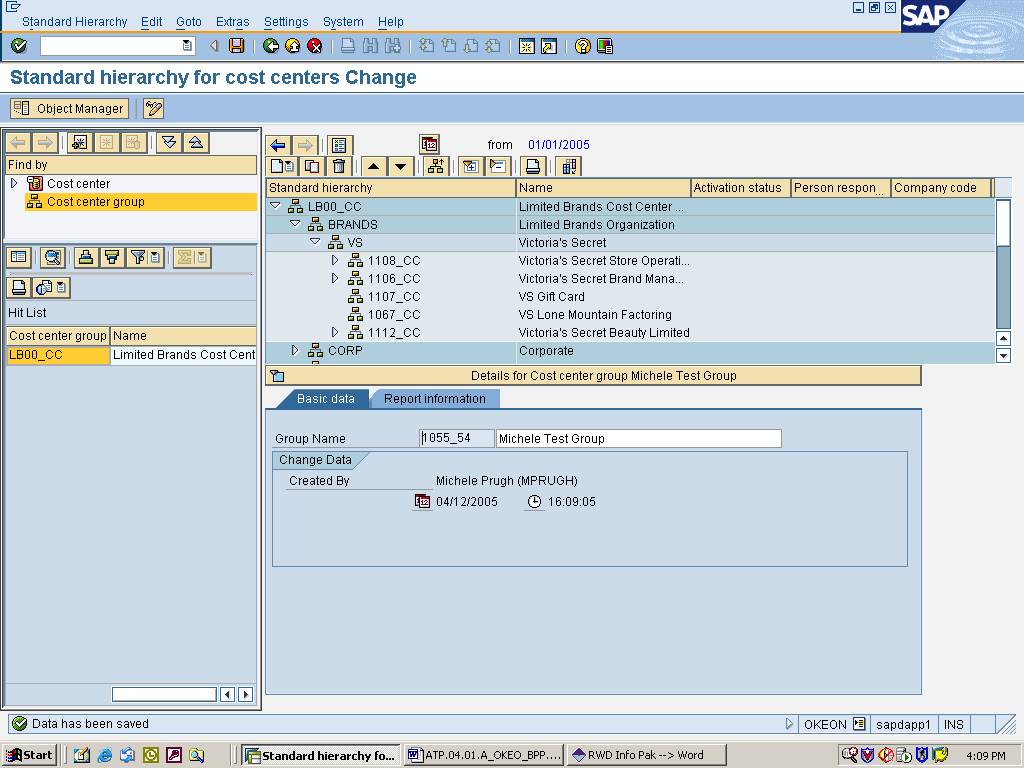
7. Click  to save the changes.
Standard
hierarchy for cost centers Change
The system displays the
message, "Data has been saved."
8. You
have completed this transaction.
Result
You have changed or displayed a standard hierarchy.
Comments
Screen view is the same for "display standard hierarchy."
It allows for view-only access of standard hierarchy details and roll ups.